
Ran across this the other day and thought I'd give it a try. It turned out not too bad so I'll pass it along to y'all (yes I just said y'all).
So depending on where you look and/or what camera you have, hard cases be tricky to find and often times pretty pricey. Depending on quality, you can find hard cases on Amazon starting around $40-50 up to as fancy as you want to get. The problem I find on many reviews of these products is that people buy cases and it turns out their cameras don't fit in them very well, or they have fairly limited space (more commonly on the cheaper cases - usually room for the chassis and a lens or two...).
For a guy like me, on a college budget and finding it hard to justify buying a quality case, this DIY is perfect. It basically gives me an expandable hard case, custom fit to my camera and lenses. And the best thing? Cost me about $20 in foam. Second best thing? Super easy.
First things first, you need your B.O.M. or Bill of Materials (thank you Jerry for that wonderful term).
- Old Suitcase - these are technically antiques in some cases so check out yard sales and garage sales to catch them for a decent price. Luckily for me, Reina has a few lying around.
- High Density Foam - each case is going to be different as far as size and depth but I recommend getting a high density foam. For mine I got three 2"thick pieces.
- Tacky glue
- Sharpie
- Scissors, sharp knife, or electric meat cutter (clean those if you use them...)

Step 1:
Cut your foam so it is snug in the bottom of the case. For this reason I recommend getting foam in pieces about an inch or so bigger than the case itself. My particular case took two pieces of the 2" foam, which turns out to be the best situation.
 |
| 2 layers of foam |
Step 2:
While the foam is in the case. Position your first item, whether it be a lens or the chassis, and lightly outline it in Sharpie being incredibly careful not to mark your camera equipment. Make sure that you make the outline a little bit smaller than the actual piece of equipment. You want the fit to be snug so it won't pop out. The snug-ness is the security in this case.
 |
| Remember, slightly smaller than the actual item. |
Step 3:
This is the tricky part.. kinda. The foam is kind of difficult to cut the way you want it. I started off trying to use scissors and quickly gave up in favor of a sharp knife. I've read of people using electric meat cutters and I think that might work better but as it turns out... I don't have one. So, cut out the foam and don't worry about how clean it looks. Once you get it in there it looks fine and eventually it will wear down to a cleaner look.
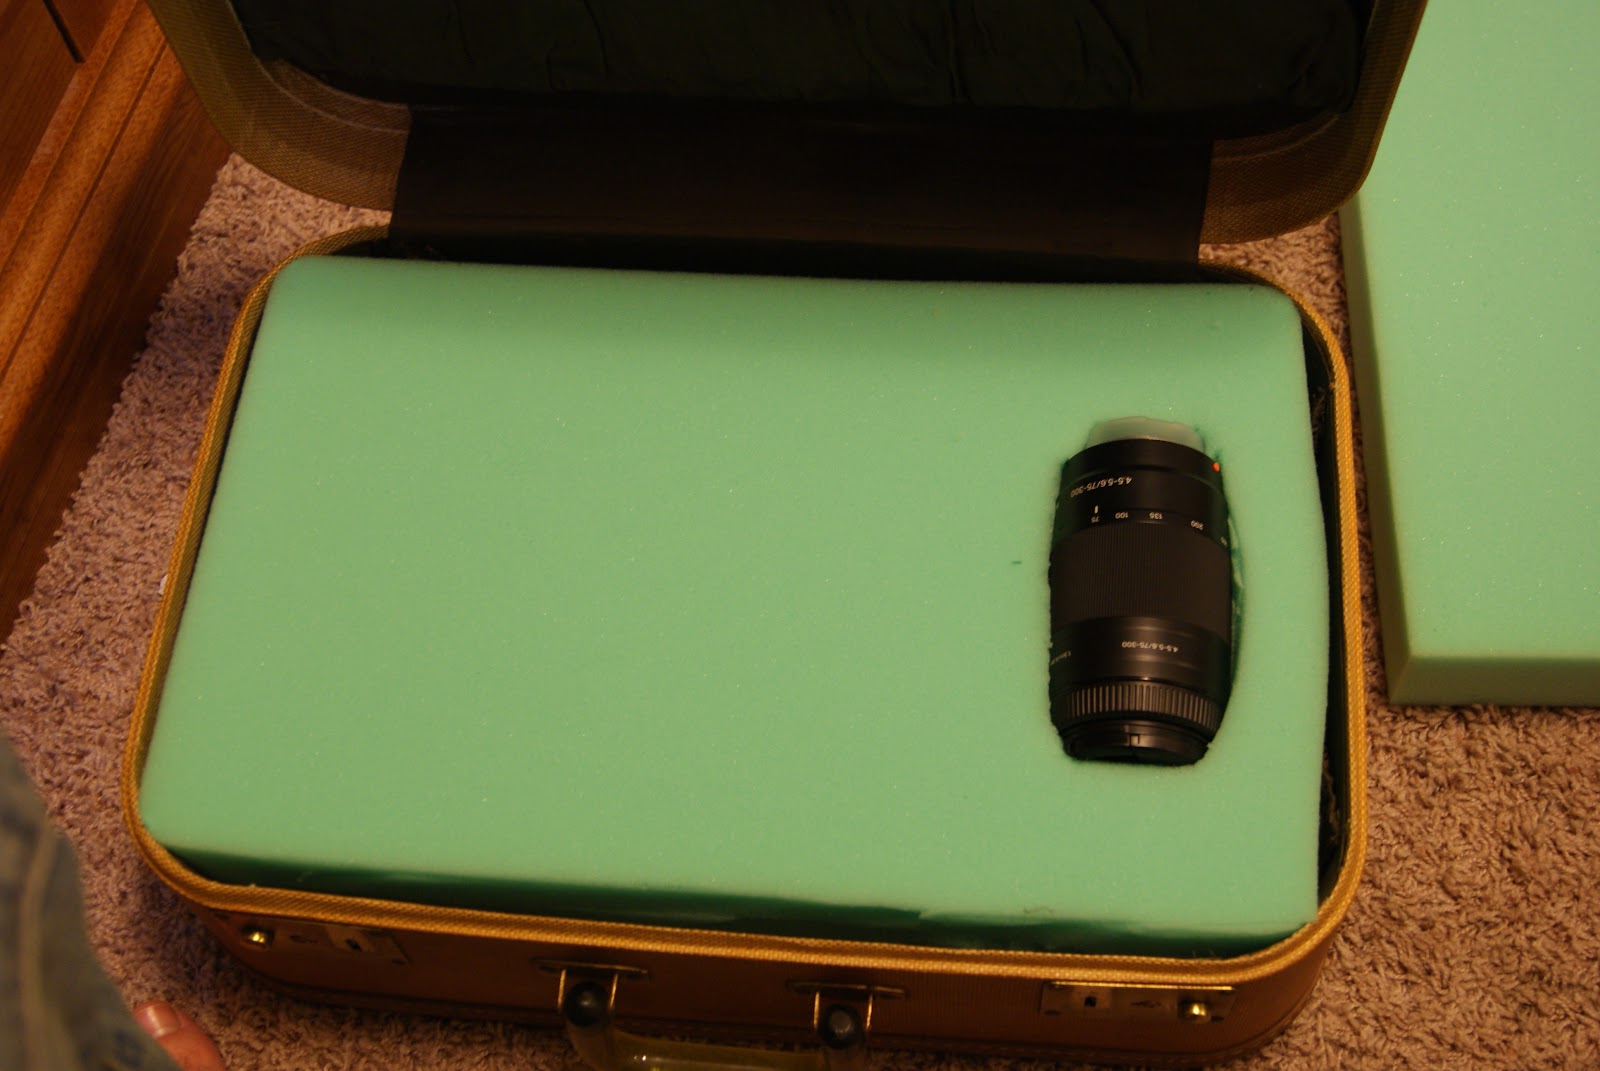 |
| See? Nice and pretty. |
Step 4:
Much like shampoo, you simply rinse and repeat... minus the rinsing part of it. Make sure to arrange the cut-outs so you can cut more out if you so choose in the future. If you don't plan on expanding your equipment utilize the space so things are evenly spaces to prevent over crowding.
 |
| I left space for my wishlist below the chassis and 18-55mm. |
Step 5:
Finally, after making sure everything fits correctly remove the x amount of layers of foam. Starting at the bottom of the pile use healthy amounts of tacky glue to attach the foam to itself and the bottom of the case. For the top of the case, I highly recommend the type of foam that looks kind of like an egg carton so it's less pressure but the same amount of protection for your equipment. Unfortunately JoAnns didn't have any of that today so I used the normal foam and left it unglued so eventually I can replace it. After that you're now the proud owner of a home-made hard shell camera case!

Hope this helps you!
No comments:
Post a Comment