Showing posts with label In the Kitchen. Show all posts

Salt Bark Chicken and Italian Fried Potatoes

Salt Bark Chicken and Italian Fried 'Taters


Good evening! So I figure it is high time that I finally put a cost-efficient recipe up on my blog! As I was starting dinner tonight I was slapped in the face with the epiphany that the meal I was making would be a perfect recipe to share with all of you!

I am quite proud to say that it is a creation of my own making and over the past year I have perfected it to the point of food-ecstasy. Tonight's rendition was the best yet and I have hopes that it will only get better from here. The best part of this meal is that it is incredibly easy and incredibly cheap. I don't typically use exact measurements and recipes, but I will do my best to provide you with one. Let's begin, shall we?

**You'll see that the instructions are rather wordy. I write this mainly for beginning chefs and the extra hints, tips, and descriptions are geared towards them. For those of you who are well-taught in the ways of cooking, please feel free to skim for the important parts - it's a fairly straight forward recipe and easy to put together if you have some experience in the kitchen. **

 Ingredients

  • 1 Chicken Breast per Person 
  • Salt and Pepper
  • Extra Virgin Olive Oil (If you're not worried about calories, veggie oil makes it even better!)
  • 6-9 Medium sized golden and red New Potatoes
  • Oregano
  • Garlic Powder
  • Rosemary
  • Basil 
  • Red Pepper

Step 1:

The first thing that you have to do, for the sake of timing, is take your new potatoes and dice them into cubes just under an inch in size. Toss them into a fry pan with enough Extra Virgin Olive Oil - or as my good friend (not really) Rachel Ray calls it, E-V-O-O - to lightly coat the majority of the potatoes. It might take a few attempts to perfect the amount of oil you need. You don't want it too dry because it might burn the potatoes. On the other hand, too much makes them overly oily and quite soggy; and no one likes soggy potatoes. 
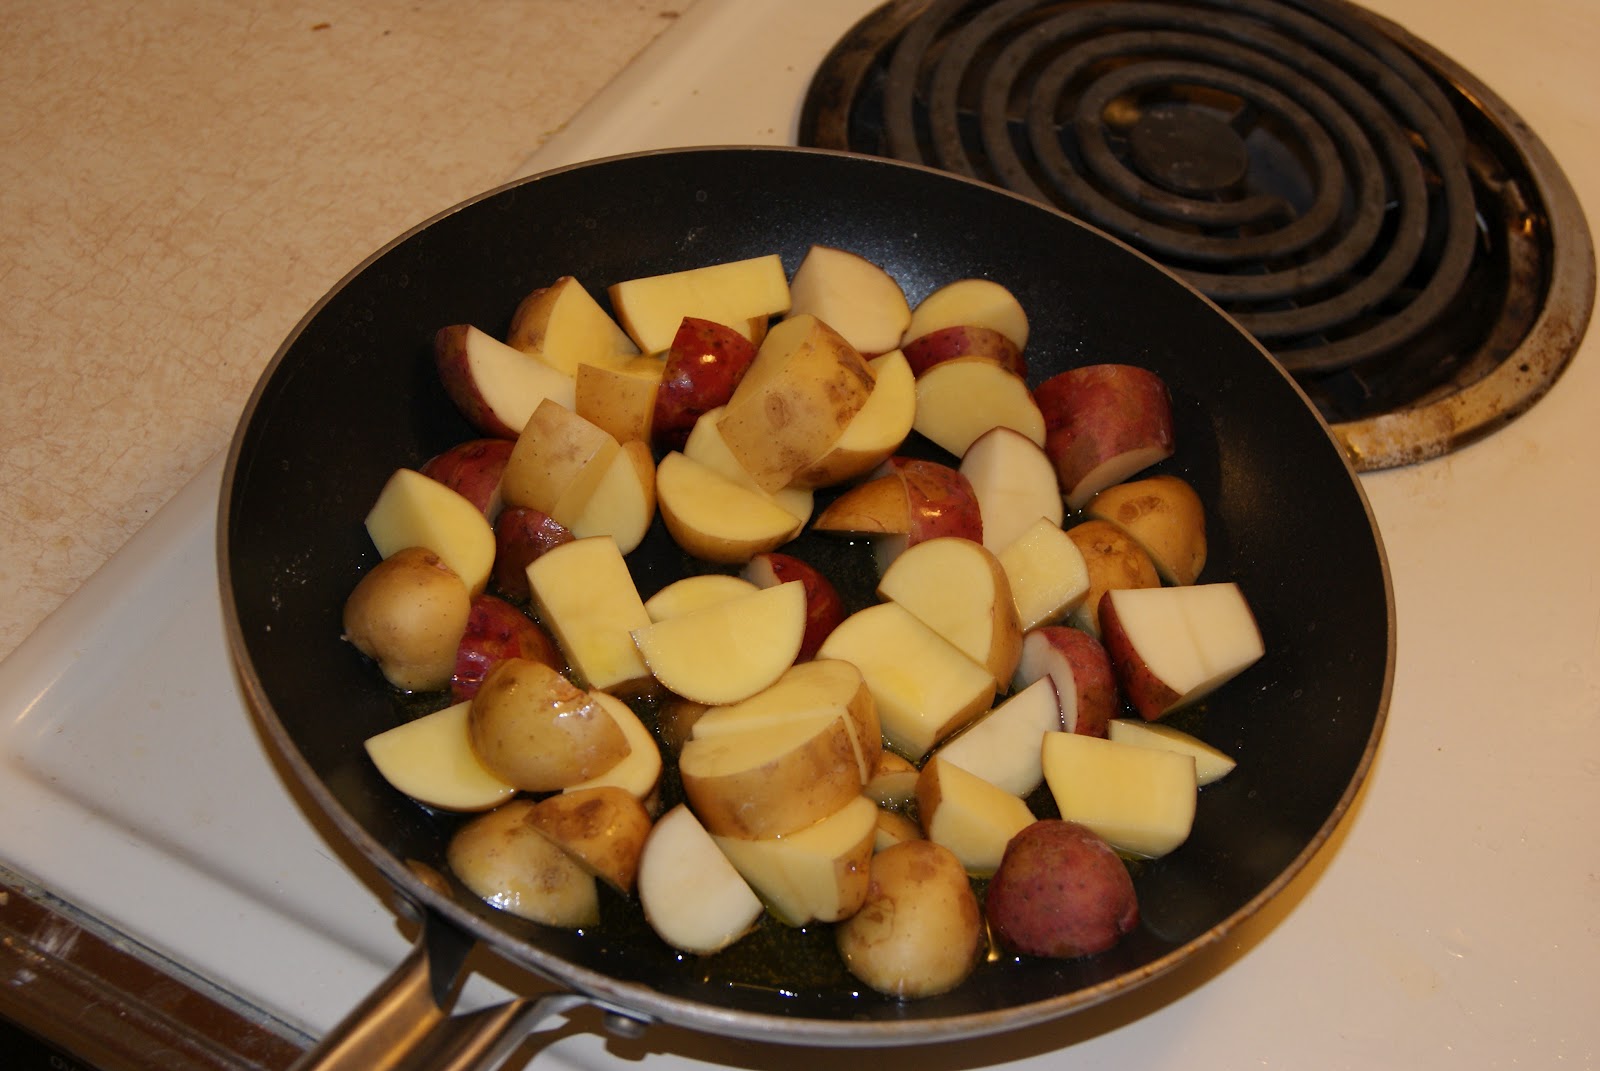


As soon as you start the potatoes, you need to put enough EVOO to lightly coat the bottom of a fry pan. Heat the oil over medium-high heat until it starts to shrink away from the edges of the pan - you'll think I'm crazy until it happens and you'll know exactly what I'm talking about. Once that happens, plop your chicken breast right into the pan and get your hand out of the way. The chicken should start hissing and spitting and you don't want to get burned with hot oil. *If your chicken doesn't start sizzling immediately, fear not, it will in a few minutes.

Sorry, no pictures for this step. Didn't hit me until the next step that I should do this blog and take picture.

Step 2:

After two minutes or so you'll be able to see the beginnings of a nice golden brown on the underside of your chicken. At this point you should take a healthy (by healthy I mean unhealthy) amount of salt and pepper and sprinkle it on the up-facing side of the chicken before flipping it over. Again, be careful of the firestorm of burning oil at this point.

This is the sight that will greet you upon first flipping of the chicken. It's already looking delicious, in an odd, raw-chicken sort of way. It's important not to forget about the potatoes. The trick with them is to find the balance between letting them sit, acquiring  that nice golden brown and keeping them moving to prevent them from burning. This is something that cannot be taught over the interwebs and can only be learned through experience. If you burn your 'taters... fret not, because you'll get it. You just have to try again. 

Step 3:

In order to get a good "bark" on your chicken, you should be flipping it every two or three minutes, applying a nice coat of salt and pepper each time. Now after you flip the chicken for the second time, your potatoes will be about ready for seasoning. All you have to do is take your spices (oregano, salt, pepper, red pepper, garlic powder, rosemary, and basil) and sprinkle them over the spuds and toss them a few time to evenly disperse the flavors. They should look a little something like this:

Step 4:

By now you have your pattern down. Flip the chicken, coat in salt and pepper, stir the 'taters. Unfortunately, you'll soon find that the temperature on your chicken has stalled out around 140 degrees. Technically speaking, they generally recommend that chicken be cooked to a temperature of 165 degrees. This is where you employ the handy-dandy cookie sheet trick. Take an old cookie sheet and set it on top of the fry pan in order to trap in some of the extra heat and put that temperature back on the rise.


A little word to the wise, when you go to flip your chicken (because you'll still need to flip it in order to prevent it from burning the bark) remove the cookie sheet with some tongs. That cookie sheet gets surprisingly hot as it sits there.

As for the 'taters, turn down the heat and makes sure to move them every now and then until the chicken gets up to temp. 

Step 5:

Now that your 'taters are done and your chicken is up to temp it's time to plate it up and chow down! The whole process is only going to take 15-20 minutes before your sitting down at the table and stuffing your face with delicious food :) I hope you enjoy!


Upcoming DIYs!

Hey everyone! I know I've been really slacking on my DIY and money-saving tips/tricks, but it's been a pretty crazy start to the summer. Fear not however because I have not forgotten and I have a ton of fun things planned for the second half of summer!

Before I get to that though, I just have to give a HUGE shout-out to my fiancee who will be competing in the prestigious and awesome Miss Washington pageant in only 10 DAYS!!! No matter what happens I will be so incredibly proud of her (but between you and I, I think she's got a pretty stinkin' good chance!). So the next few days I'll be busy helping her prepare for all the festivities that start in a week. If you want to learn a little bit more about her or the organization in itself, you should definitely check out her blog. You can find that here.

Okay, thank you for humoring me. After I get back from the pageant in Renton (and even a little before that), the DIY projects will be in great abundance!! I'm taking this Friday-Sunday off and going to visit my grandparents/watch the pageant and I'll be spending almost an entire week working in my grandfathers shop doing this and that preparing for and even completing some of my up and coming projects. Needless to say, I'm pretty friggin' stoked!

Below are a few of the projects I want to do before school starts again in September. For those of you who simply cannot wait for me to do them and offer my own tips and tricks, most of the ideas come from Pinterest so cruise around on the to find these and many more projects to get started on!


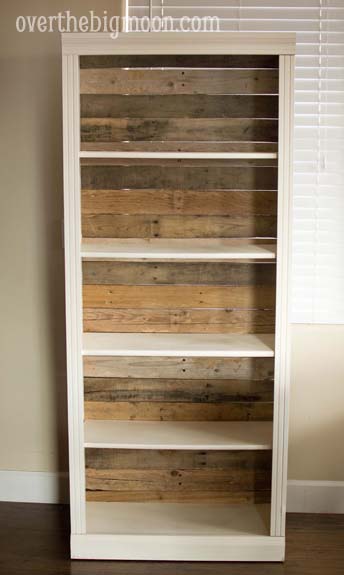
  • PALLET BOARD BOOKSHELF

I find myself always bringing home books - I think it's some sort of disease or something - and as a result, I am in desperate need of new bookshelves. As a writer/English Major I need to have a stylish and personalized library area and so I have decided to spruce up my bookshelves to add a little of myself to them. Super stoked for this one!

photo and idea come from overthemoon.com!

  • CEDER-LINED CIGAR/JEWELERY/ANYTHING BOX

Ever since I was a little kid I've been fascinated with little trinket boxes. I was always saving up money and buying ones to put this and that in. I distinctly remember getting one with the stereotypical trashy wolf howling at the moon glossed on the cover. This and my recent interest in the casual cigar experience has led me to finally getting around to building my own. I hear these can be kind of tricky in terms of getting them all nice and square... but hey, that's what makes it personal right?? Sure hope so... 

eventually i hope to make one this intricate, but mine first one
will probably be much more simple

  • PLATFORM BED RISER

This one is probably going to be my biggest project of the summer, and is definitely the one I am looking forward to the most. As always with apartment living, I am hard-pressed for storage space and frankly my bedroom is a little unorganized. I like cool looking beds and this would definitely make my bedroom more trendy and efficient. This will probably end up taking me a weekend or two, which means I might be sleeping on the floor for a week or so (motivation to get it done I guess!).

more bookshelves! thank you pinterest.. and whoever pinned this first!

  • HANGING STORAGE FOR POTS AND PANS

One of the biggest problems every kitchen - no matter how big or small - faces is how to store your pots and pans. They take up an obnoxious amount of space and no matter what, there doesn't seem to be any good place to store them. Until now that is... Reina has a pageant friend who's brother is incredibly awesome at home decorating apparently and I'm and going to shamelessly steal his idea. The picture below is the closest I could come to finding what it'll be like. He basically took a really sturdy tree branch and hung it from the ceiling in his kitchen area and hung pots and pans from it making it an incredibly good lucking and effective way to store your pots and pans!

sorry this isn't exactly what i'm going to do.. but it's close enough to get the picture
There will probably be a few more little ones here and there, and hopefully a few money-saving tips and tricks as well but these are my major projects for the summer. If you have any ideas or requests for projects that you would like to see me try, definitely leave a comment below and I'll see if we can make it happen!

Cheers everyone, 

Grocery Lists 101

I feel like there is one more major thing that I need to hit on before I start posting recipes. For those of you looking to really save money in the kitchen... this is where you're going to do it!

Grocery Lists 101

Let me be the first to tell you - from years of personal experience - that not having a grocery list will cost you anywhere between $10-20 A WEEK!  Yes that's right ladies and gentlemen, $10-20 a week.  You may not realize it at the time, but next time you go to the grocery store without a list just count how many things you came home with that you don't really need. Another thing to consider is what you got simple because you "thought you could use it" and three weeks later it's still in the fridge. To help combat that tendency, I've composed a little "How-To" lesson on compiling and implementing a weekly grocery list.

  • First and foremost you should create a Weekly Menus. One of the easiest ways to save money is to simply plan ahead.  Whether you list out breakfasts, lunches, and dinners is completely up to you.  Personally, I just plan dinners and make my lunches from leftovers and buy breakfast stuff around once a month.  The reason I recommend only planning one week at a time rather than once a month is simply a practicality answer. The reality is that most things you're going to get at the local grocery store don't have a shelf life longer than a week.  There are a few things that you can plan farther ahead for but knowing what you can and cannot buy in bulk is essential.
Something along these lines would be helpful.  Things like this
can be found all over the internet and printed off for free!

Taken from the Costco website.
  • That being said, Costco can be both a money saver and a black hole for money.  The key is figuring out how to utilize buying in bulk to the best of your abilities. Learning what to buy at Costco and what to buy at your local grocery store is going to be one of the single greatest ways to shave money off of your grocery bill. Below is a quick (and by quick I mean long) list of do's and don'ts for buying in bulk:
Do's
1.) Staple Items:  These include things like flour, sugar, most dry baking ingredients, and oils (vegetable oil, EVOO, etc.)
2.) Pastas/Grains: Things like uncooked pasta, rice, and quinoa take an incredibly long time to spoil if stored properly.  The key to storing them correctly means keeping them in airtight and dry containers.  Generally I try and store mine in darker places like a pantry or cupboard, but it's not absolutely necessary.  Things particular items tend to come in varying "bulk" sizes ranging from 2lb - 50lb sacks.  Be practical when considering what size to get.  Consider how much you use a particular item and in what quantities as well as where you'll be able to store it.
3.) Canned Items: In trying to keep with the organic/fair-trade motif, try your best to cut down on canned products as they contain lots and lots of preservatives. That being said, sometimes you just need a canned products so you might as well use those preservatives to your advantage. Most things you can either buy in one or two huge cans or a pack of normal size ones.  Again, consider storage capabilities and usage when buying.
4.) Dry Snack Foods: First thing that comes to mind is Trail Mix. Costco sells 2lb (I think) bags of Kirkland brand trail mix for dirt cheap. The best thing about it is its GREAT trail mix.  Other items like this include: Beef Jerky, Chex-Mix, Nuts, and Dried Fruits.  They're almost always sold in resealable packages that make for extended shelf life.
5.) Meats: I was incredibly hesitant when adding this to the "Do's." My only stipulation is that you can only buy meat in bulk if you have the ability to freeze it.  Places like Costco sell giant bags of chicken breasts (usually already frozen), sausage, and ground beef.  If they're not already; divide them into meal-sized portions, put them in zip-lock baggies and straight into the freezer.  If you don't have good freezer space, save meats for the local grocery store.

Don'ts
1.) Dairy: This, like most of the things on this list is obvious why you shouldn't buy in bulk. Unless you're absolutely crazy about milk and such, save it for the grocery store otherwise your double-pack of milk is going to go sour before you can get to it.  The only exception to this rule is non-soft cheeses. Cheese like cheddar, Swiss, and harder cheese tend to have a longer fridge-life and even if it starts to mold you can simply slice it off and keep on cheese'n!
2.) Produce: Again, it'll spoil before you can get through your jumbo pack of lettuce.
3.) Toilet Paper/Paper Towels: This is simply a matter of storage practicality.  If you have the space to store  the 48 roles of two-ply toilet paper... knock yourself out.
4.) Condiments: Unless you're a ketchup freak, go to the grocery store where you only get one bottle at a time rather than two or three.
5.) Seasonings


  • Remember, whenever you're compiling your list or find yourself wandering the grocery aisles there are always a few things to keep in mind.  You must always consider your storage capabilities, the shelf-life of whatever it is your buying, and last but not least; is the item your considering practical and/or necessary?
  • Another notable thing would be to keep a running list. There are a few things that will crop up in the middle of the week as you run out.  I highly recommend keeping a magnetic list on your fridge.  As you think of something or use the last of an item be sure to write it on the list immediately.  Speaking from experience again, if you don't do it the minute you run out, more likely than not you will forget it at the store and find yourself scrambling when you need it again next.
I know that this was a rather long and boring post, but I hope that it helps in some little way. I've found repeatedly that lists can and will save you money on a weekly basis. There are a lot of different things that you can do to help save money in the kitchen, but at the base of everything lies a well organized and planned grocery list so.... 

Go ask your mom for one of those awesome magnetic list thingers (because you know she has one!) and get your list started tomorrow!

Until you read again, 

Connor!


A Few College Kitchen Essentials!

Alrighty... a lot of my friends have been asking my for good cheap and easy recipes to make at home in order to save some money on the food bill. I will be doing so, but first I figured I'd do another list of essentials (if you haven't figured it out yet.. I'm pretty big on lists).

I grew up with a wonderful mother who fed my family home-cooked meals almost every day of the week. Growing up I didn't think much of it but as I got older and older I realized that this wasn't something that the typical kid experienced. I'm not dissing parents who utilize Hamburger Helper and the like, but there is something to be said about sitting down at the dinner table as a family to a home-cooked meal.  To this day I'm positive it's the reason I'm so close with my family.  Not to mention, it taught me to be a pretty decent cook (if I do say so myself).  I never thought that my passion for cooking and eating would actually help me save money later on in life.  That being said, it would be fair to say that my kitchen is not typical of a poor college kid.  I've dumped more money than I would ever recommend for anyone who isn't in love with cooking.  There are a few things - five to be exact - that I do have that I feel anyone planning to do any sort of cooking should have. Without further ado, I shall introduce them and tell you exactly why you should have them in your cabinets!

**DISCLAIMER: For those of you living in the dorms... I apologize, this list most likely won't be of much help.  I live in an apartment and therefore am writing more for those people.  However, if your dorm has a community kitchen,  you can get most of these and they'll be of help to you even there.  Enjoy!


Without a doubt, I think that a Crock-Pot is the single greatest kitchen appliance/thing a college kid can own.  It takes delicious meals and makes them so easy to make a child could do it - true story; I've seen it.  The wonderful thing about Crock-Pots is that their versatility is astounding.  While you won't exactly be grilling steaks with this bad boy, you can definitely do more with it than make soups.  Like the picture above (I'd have shown you mine but it's currently in use!), pot roasts like your momma used to make can now be on your kitchen table!  Simple as throwing meat, taters, and veggies in before you go to school and by the time you get home for dinner it'll be ready!  You can also to every kind of soup, some casseroles, roasts, and all sorts of other goodies.  These babies are so practical they have complete cookbooks devoted to Crock-Pot recipes.

I will offer one little bit of advice for when you go shopping for one of these.  If you have the space, opt up from the 3qt. to the 5qt.  You can easily get a 5qt. from Wal-Mart, Target, or Shopko for less than $30.  The thing about a bigger one is that you can plan for leftovers.  Planning for leftovers is something you'll hear me say again and again when it comes to cooking.  It's one of the best ways to save money on meals; especially lunches!  I personally have a 3qt. because that was what was given to me and I thought it'd be okay, but I always find myself with little to no leftovers at the end of the night. Just something to think about....

Next.


Before you ask; no, they technically don't have to be Pyrex brand but I highly recommend them.  Pyrex has an amazing reputation for glassware.  They're oven-safe, microwave-safe, dishwasher-safe and will last you as long as you make it without spiking them like a football in a dinner celebration. It's been my experience that somewhere along the line of existence, casseroles have gotten somewhat of a bad reputation.  Obviously they were simply making them wrong! Casseroles can be a party in your mouth while being one of the easiest ways to save both time and money.  As you see, I have two different sizes.  Realistically you only need one, but as a cook I like to have options. If you have to pick one I would implore you to get the big one and here is why:  If you cook a 9x13 (that's the size for you rookies) casserole you're obviously going to have a ton of leftovers.  Generally too much to be able to store in the fridge without some of it going bad.  If you utilize the next item on my list you can divide the leftovers into meal/snack sized portions and freeze them.  This is an amazing time (and money) saver.  Those nights when you get home late from work... or a party... and your stomach feels like it's going to eat itself simply take one of them out of the freezer and nuke that sucker until warm. Golden delicious....

Moving on.


Remember like two seconds ago when I mentioned that you'd be using these with casseroles? Yeah. Me either.  As a refresher, if you want to save money KEEP EVERYTHING YOU DON'T EAT.  Aside from using them in the freezer for casserole leftovers, any leftovers that amount to more than two bites should immediately go into a Tupperware.  You'd be surprised how much money you'll save on snack foods and lunch materials when your fridge is full of dinner leftovers. My dad has this weird aversion to leftovers (something he still refuses to admit to) and if you're they same way... get over it! Here's a little-known secret: more often than not, things taste even better the second day.  Overnight the flavors and spices become more and more bold as they meld together over time.  

That being said, here's another little tidbit of advice. Start the practice of planning for leftovers now.  Every time I cook a meal I purposely make about twice as much as I really need unless I'm really strapped for cash come grocery time.  That way I know that for lunch the next day I'll have soup or casserole, or whatever I had for dinner the night before.  If your a guy, this opens up your breakfast potential as well. Girls for some reason typically don't like eating last nights dinner for breakfast and that's cool.. I guess. Just kidding! But really, you may think your paying more money because your making more come dinner time but remember this: an extra onion or box of pasta is generally going to be cheaper than lunch meat or cans of soup for the week.

Almost there..


This seems almost too simple to mention but there is a vital aspect of this that I feel I need to bring up.  A good frying pan and pot is not something to skimp on financially.  Now, I'm not saying that you should go to Williams-Sonoma (a cook's version of porn) and spend $100 on a fry pan.  That's just ridiculous.  What you should not do is go down to Wally-World and buy the cheapest set on the shelf.  There are a few things that you should keep in mind while shopping for these.  First and foremost is size. Usually you can cook smaller amounts in bigger pans but you cannot, no matter how you try, cook large amounts of food in small pots and pans.  I express to you how frustrating it is to try and keep a bunch of food in a small fry pan while cooking.. Save yourself the mess and get a good-sized pot/pan set.  The second thing you should do is be sure to make sure that your fry pan has a Teflon or other non-stick coating on it.  Nothing is harder to do than trying to scrap cooked-on crap off your fry pan. The other recommended thing when it comes to fry pans is a good heat-proof handle. Many of the recipes I'll be posting involve saute techniques in which you'll want to grab that handle and you don't want it to be hot when you do!

And finally!


Another no-brainer but don't fall victim to the same mistake I did. I used to think that because my momma had trained me in some of the finer arts of cookery I didn't need to measure ingredients.  Like my dad always says, there's nothing better for measurin' than the good old Mark I Eyeball.  That is a fallacy.  You definitely need to measure things to begin with.  Now more often than not I can get it close enough to what I want without dumping everything into a measuring spoon/cup... with the exception of baking.  For those of you who don't know; baking is an exact science.  Whenever you're baking anything, make sure that you measure everything exactly or else you're going to end up with some nasty cake.  Trust me, I speak from multiple experiences...  These are going to be one of your gold standard tools in the kitchen.  And the beautiful thing? There is no such thing as a set of "high quality" measuring utensils.  Dirt cheap at Wal-Mart or Shopko so go get the cheapest pair you can find.

- - 

Well that about finishes it up for essentials. If you have any questions or additions definitely leave a comment. Let me know if you want any advice for equipping your kitchen.. where you can really start to cut corners and where you should actually invest in some quality things just let me know, I'll be happy to offer some advice.  In the next week or so (I'm finally on Spring Break!) I'll be posting some recipes to start it off.  Any requests just let me know!

Until you read again,

Connor